The Restoration of a Radar, AA, No3 Mk2
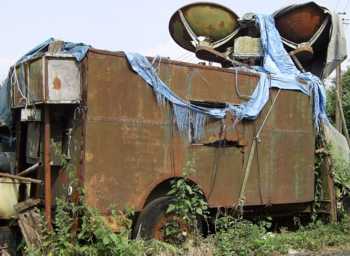
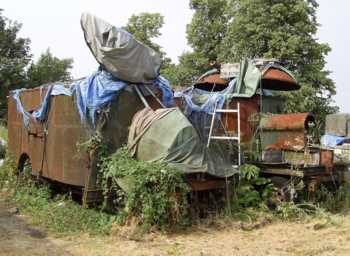
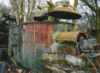
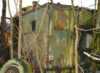
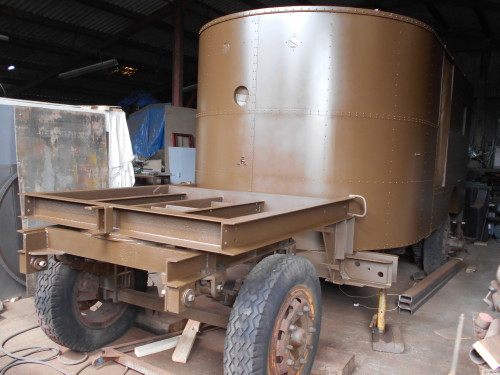
These pictures show the condition of the two radar trailers when first delivered to the yard.
"What was this...?"
It was early 2003 and whilst wandering around
a scrap yard near Hitchen in Herts, namely Rush Green Motors, I noticed this rather strange looking
green object hiding amongst the undergrowth. I suddenly realised that it was a radar trailer.
I seemed to remember seeing a picture of one in a magazine a while earlier.
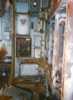
After a close inspection
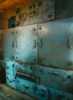
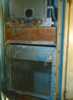
I could see that the weather had got the better of it. There was widespread rust and new trees
growing up through it. I very carefully managed to climb into it being very weary of the rotten
wooden floor. It looked a complete mess. Someone had decided it might be a good idea to start
undoing things and then leave the bits lying around, they obviously got bored with that and
decided to smash all the crts and pinch some of the valves and meters. The thin steel roof had
rotted away in parts allowing the rain to cascade in over various pieces of equipment causing
extensive damage and build up of rust. However after gathering up all the bits and after finding
out where they fitted I soon realised that the interior was about 95% complete.
Initial Inspection
I had a look underneath, the chassis was a very heavily built fabrication and some areas had
severe corosion, 1/2" material was down to an 1/8 in places but most of it was ok.
The wheels had been sat in the mud since the late 50's and had resulted in the wheel rims
rotting to nothing under ground level. Tyres were of course useless. The draw-bar was missing.
I could see all the original coats of paint and the trailer was covered in insignia and stencils.
It even had most of the serial number and data plates.
I soon began to feel very excited about this find and made enquiries with the owner. He asked me
if I had seen the other one ! About an hour later I managed to locate it after walking past it couple of times.
The site is absolutely huge, you couldn't see it all in one day. This one was a little more difficult to
get to as it was jammed in between some lorries. The interior was perhaps more complete and a little less
vandalised, at least 3 crts remained intact. Unfortunately the body and chassis was in a similar
state to the other and the roof supported a 2" layer of soil and weeds.
"I want one !"
By this stage I had decided that I wanted one, but at what cost ? The amount of work needed
to restore them was going to be far more than I had done before on any previous projects.
I thought to myself I must be mad to even consider it !
Anyway, what exactly were they ? I happened to have in the car a book 'Canada's Fighting Vehicles 1943-
1945' and on page 183 there was a picture and description. It was in fact an AA radar No3 Mk2, a British
built trailer and from WW2. Clearly the best option would be to buy the two and try to make a
good one from the two.
Well how much were they going to cost me to purchase and transport them home ?
I found from my trailer data book that they were about 9.5 tons each and knowing the cost of scrap
steel at the time it was going to be a fair amount.
After a lengthy chat with the owner a deal was struck and I was the proud owner of two No3 Mk2
radar trailers. All I had to do was come up with the cash and arrange some transport.
Arranging the transport
I knew someone who ran a low-loader business and a few weeks later, with the use of two vehicles,
they were delivered.
Being very delicate, I was worried that they might not survive craning on and off the low-loader
but they were ok. Mind you a pile of bits and pices fell of and they were all collected up and saved
for future use.
We used the crane to unload them at our place and managed to get them parked up.
The trailers have been parked up for a couple of years now with nothing really happening to them.
I will have to wait until my present project is completed before I start any serious work on them.
Further Research
In the meantime I visited the REME museum and located all the maintenance manuals for the radar, for a fee I was able to copy them . I also managed to find a manual for the trailer at a militaria fair as well. I have researched the history and development of the radar trailer and all this information will help to assist their restoration. Rubbing away at the paint as you do I found the post war census numbers and the original wartime numbers underneath ! I wrote to Beverley Museum and a few days later a letter was received from them with copies of their record cards and dates when they were struck off the army census, in this case October 1957.
Second Inspection
The cabin itself was coach built by
Metro Cammell in Birmingham. It consists of a steel frame made from angle and u-sections with a
steel sheet covering secured with hundreds of snap-rivets. Looks like I am going to have to
learn how to rivet ! The frame will need a few repairs were it has rusted but hopefully not
too much work. The sheeting is fairly straight forward. The rear panel of the cabin unbolts to
allow access to the presentation unit which can be fitted or removed in one piece through the
opening. Good job we have fork-lift trucks ! All the joints were not very water-proof as
later in the war they were sealed with bitumen. The floor consists of 1" oak tongue-and-groove
planks simply laid across the trailer chassis frame. On top of this is an insulation layer with a
'Lino' covering. The inside of the cabin is lined with hardboard, screwed to the steel frame with
wooden strips to hide the joins. A number of colour schemes have been used inside from cream to
2-tone white and green.
On the rear of the cabin, there is a large galvanised box containing a motor driven fan
and heater for the air-conditioning unit. This must have been a luxury for a war-time
vehicle, having the choice of heat in a cold country or cold for the desert. It must have
been quite warm inside considering the amount of valves and other components.
There is a rear access door for the operating crew and a side door for the technician to
access the front half of the cabin.
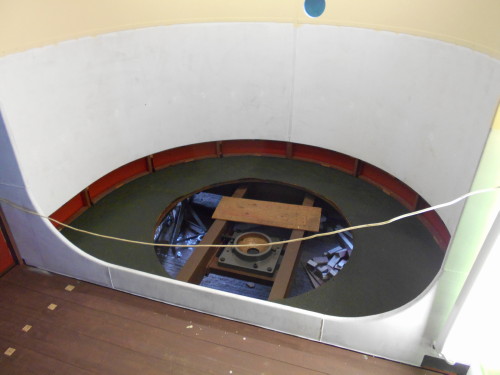
At the front of the trailer is a large steel cased box with a removable curved lid.
This houses a motor driven twin-alternator set for converting the 50Hz supply to 420Hz for some
of the circuitry. Either side of this are a pair of wooden tool boxes to carry jacking feet and
other tools. Unfortunately half of the wood has rotted away but there should be enough bits
left to reproduce new parts. Again, tongue-and-groove boards are used. They were all brown inside !
On top of the roof there was a duck-board system, some of which remains to enable
new parts to matched.
The main rotor system consists of two parabaloids on a pivoting system. The dishes will need
some repairs to the holes in them. The elevation gear appears to be ok, being fairly well sealed
but it could well be scrap if it has suffered condensation damage.
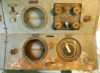
Underneath the dishes is the rotor, which contains the transmitter. It is a circular column, about
post box size with curved doors to access the different pieces of equipment. This houses the
magnetron and a large oil tank for cooling. A huge slip ring with about 50 contacts is built around
the lower bearing unit. A few parts are missing from the rotor, the most important being the monitor
unit, this was probably taken by someone who had ideas of converting it to an oscilloscope which
in effect it was. The complete rotor and dishes weighs over 2 tons and has to be removed upwards
through the cabin roof, we shall have to use the crane for this job.
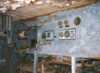
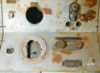
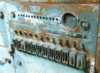
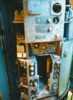
The main Presentation unit consists of a large steel frame containg sub-assemblies and panels.
This will be removed complete and restored piece by piece. Unfortunately most pieces are interconnected
by a wiring loom with screw connections, not many plugs are used, to ensure that sections may work
again I will have to be extremely careful in marking up the connections. The complete Presentation Unit
weighs about a ton. All the electronic equipment is a slate-grey colour and there plenty of areas
suitable for colour matching. One of the trailers still had canvas straps and a pull down seat still
attached and in good order.
The cabin complete can be removed from the trailer chass as it is only bolted on. The chassis is
made from angles, H and U sections all welded. It is just a case repairing or replacing any rusty
bits and then after a good shot-blast it should be serviceable. The chassis was built by Taskers
and so used fairly standard parts. I will expect to have to replace all wheel bearings and seals
and locate some new wheel rims. They are of the commercial pattern with 10 studs, not WD split-rim
type. Tyres are 36x8 high pressure (8.00 x 20), I will probably have to use 8.25x20 with a good
ply-rating, remembering the weight of 9.5 tons. The rear axle is twin-wheel, and tyres side walls
are very close to leaf-springs and each other so anything wider than 8.25 probably wont fit.
Front wheels aren't a problem. There is a standard turntable front steering system with an A-frame
draw bar, I don't think there will be any problems with this, except I will have to make a draw bar.
How far the project gets depends on how much can be salvaged, repaired or replaced. The trailer and
cabin should be fully restorable, but whether any thing works electrically is another matter.
It would be very nice to be able to turn and elevate the dishes using the handwheels on the
Presentation Unit, any more than that would be a bonus. I would never consider actually trying
to get it to transmit, messing with high power microwave frequencies can be deadly, with a power
output of a few hundred kW, the damage could be very serious, we all know how much fuss is made
with mobile phones and they only transmit a few milliwatts of power.
I expect to start restoration later this year (2007), I will update this page as work progresses.
Click on a thumbnail..


Full size image
Click on a thumbnail...
Restoration started....

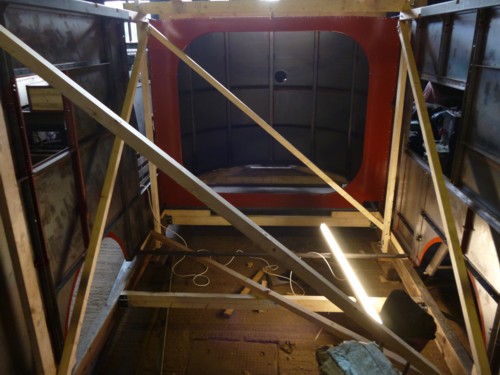
Chassis ready to be stripped

Chassis with rear cross-member and front step frame removed

Chassis after shot-blasting

Chassis with primer coat

Front step frame with new sections and plates welded in place

Chassis and step frame welding together upside down

Chassis and step frame welding together upside down

Complete chassis on side for more welding

Turntable and front axle complete suspended from step frame, now in top coat of Service Brown

Front view of chassis

Front axle

Rear axle

Rear brake drum assembled

Rear axle with hub fitted

Chassis step frame

View of chassis from rear

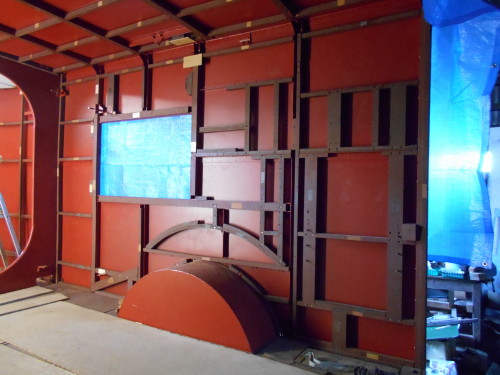
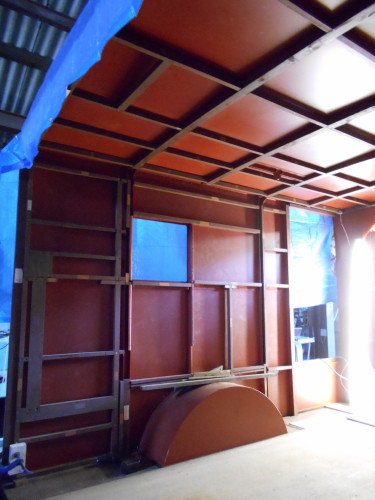
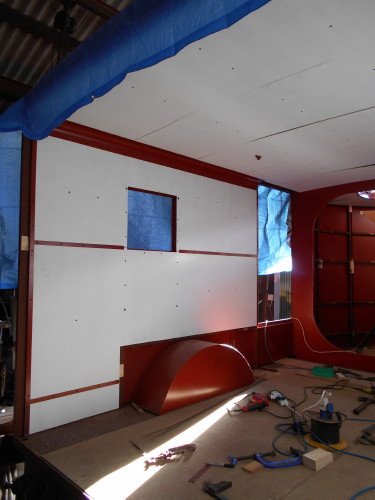
Front section of body now attached to side panels on wooden assembly frame.
Internal view of body showing assembly frame.
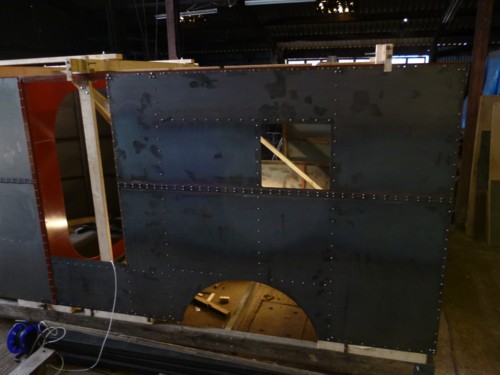
Nearside body panel showing extensive rivetting.
Internal view of offside panel in red oxide primer finish.
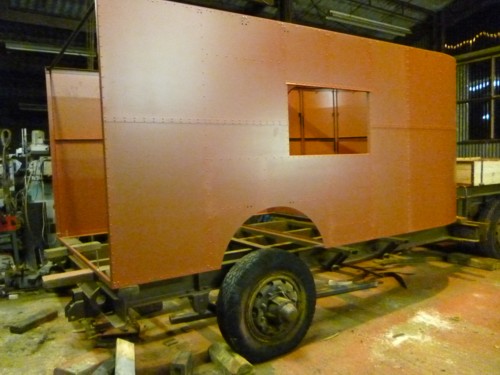
Body now resting in place on chassis.
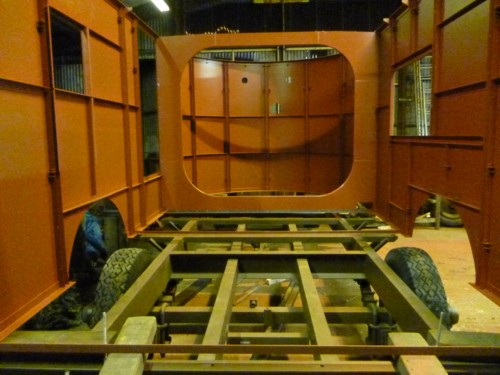
Internal view of body and chassis.
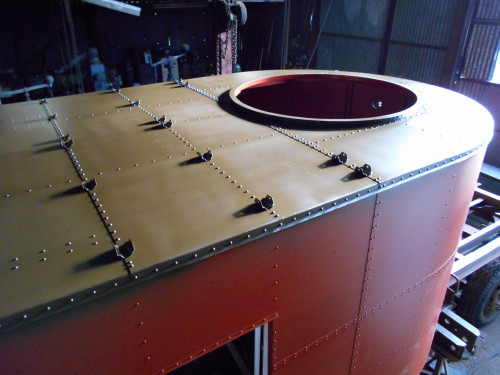
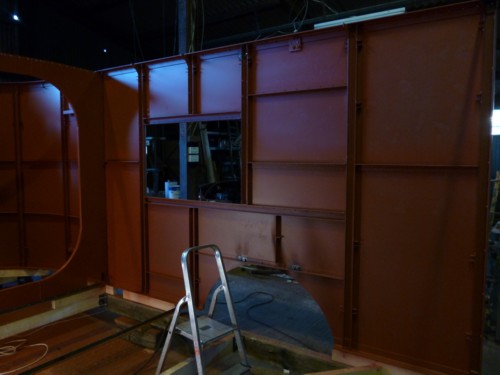
Front section of roof and walking-board support brackets.
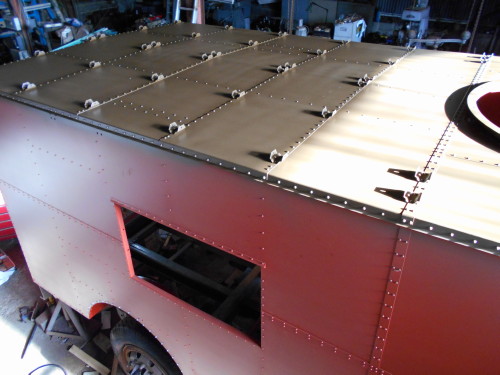
Rear section of roof.
Internal view of front roof section.
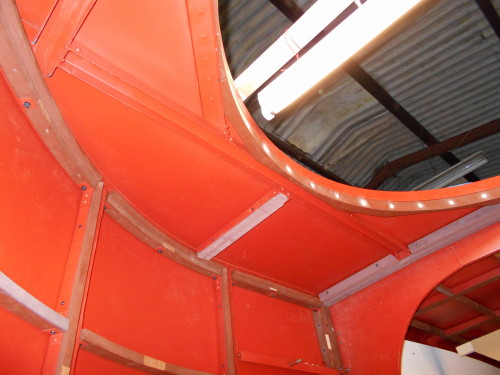
Internal view of curved section showing wooden framework.
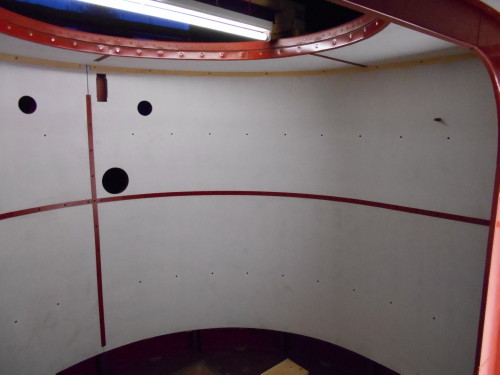
Rear O/S sidewall showing wooden framework.
Rear N/S sidewall and roof showing wooden framework.
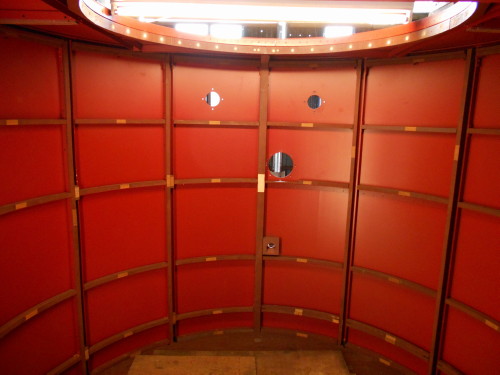
Rear N/S sidewall and roof after sheeting with hardboard panels.
Front curved section after sheeting with hardboard panels.
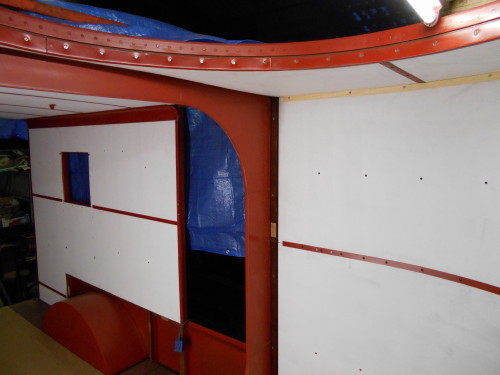
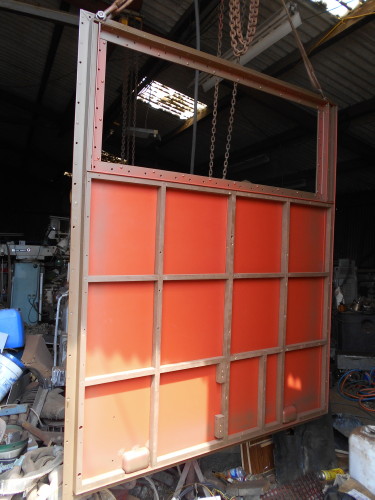
Nearside panels and steel joining strips.
Front curved section with new oak and Lino flooring.
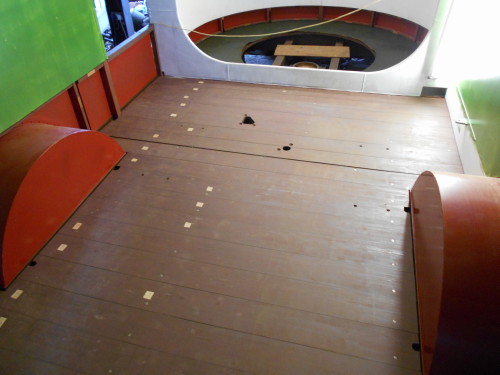
Rear section tongue & groove floorboards.
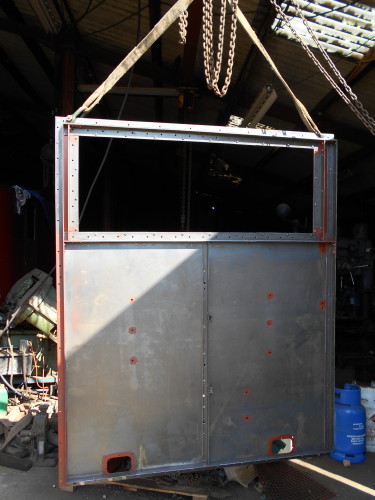
Rear removeable panel after rivetting.
Rear removeable panel after spraying with primer.
Rear panel showing wooden framework.
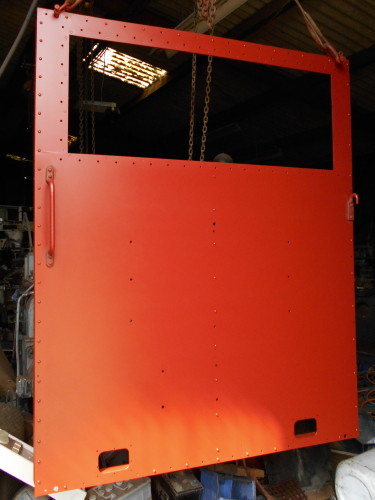
Body with first coat of BS381 shade 499 Service Brown.
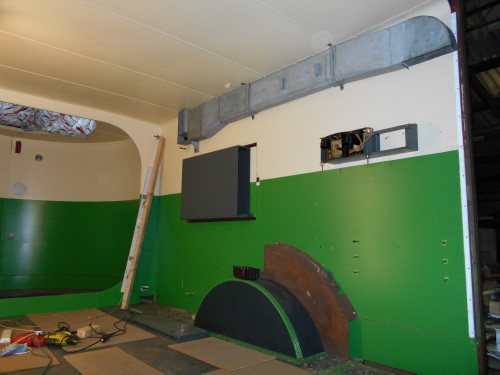
Original internal colours of Cream and Grass Green 218 (BS381C), with galvanized air-con ducting & telephone type'F' bracket.
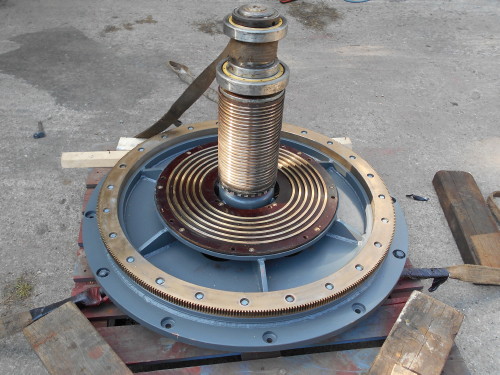
Underside of rotor frame with bearings and 26 slip-rings (shown inverted)

Rotor base with slip ring supports.

Rotor frame bolted to base.
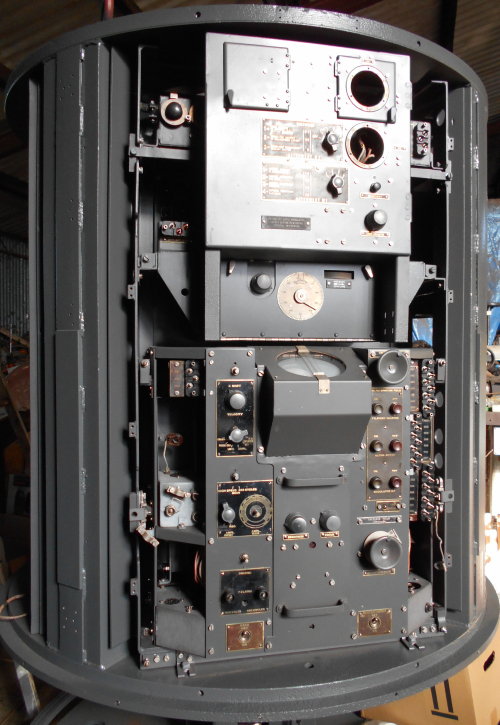
Rotor receiver and monitor section nearing completetion.